- Print your document using your preferred application.
- Choose the printer suitable for you based on your requirements. Printer options are:
- Toshiba Print A4 (A4-size, black&white)
- Toshiba Color Print A4 (A4-size, color)
- Toshiba Print A3 (A3-size, black&white)
- Toshiba Color Print A3 (A3-size, color)
- Default printer is "Toshiba Print A4 on PAPERCUT" (A4-size and black&white)In the printer menu, select ”Toshiba Virtual Queue on Papercut”
- Set your options for printing (the picture below is from Microsoft Office applications. The view varies depending on what application you are printing from.)
a) single-sided or double-sided
b) stapled
c) portrait or landscape orientation
d) paper size A3 or A4


- Click on the Print button. Notice that you cannot change the size or color settings afterwards at the Toshiba device. How much is charged to the account depends on whether your printouts/copies are A4 or A3 or color or B&W.
- Log out of the workstation or lock it. Go to the Toshiba multifunction device.
- Touch the Toshiba card reader with your copy card.


- Touch ”Select Jobs”.

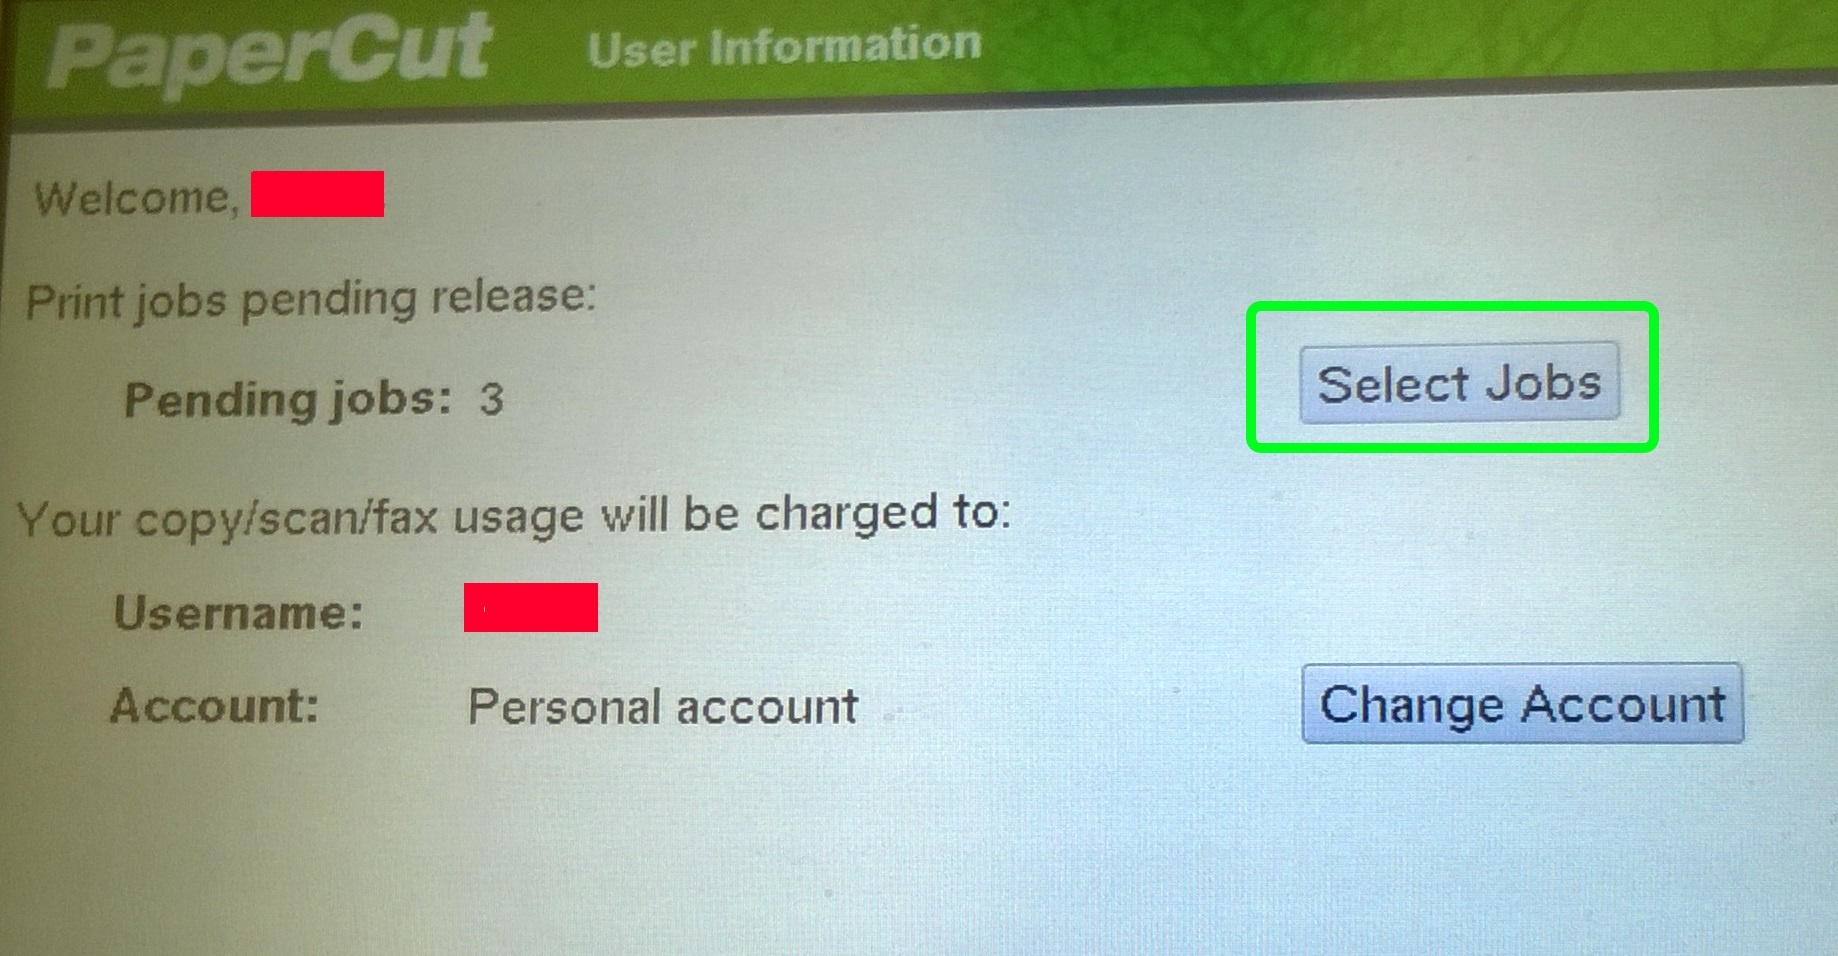
- Select a job to print by touching ”Print” to the right of the job. (If you want to delete a job, touch ”Cancel”.)
- The job is printed and the screen displays the message ”Successfully queued selected job for printing”.

Tulostus
Metropolia
Overview
Content Tools
Apps
Pages
Blog
Labels
Space Operations