PaperCut - Shared Account Instructions
Using a shared account
Print your work as usual using Toshiba virtual queues:

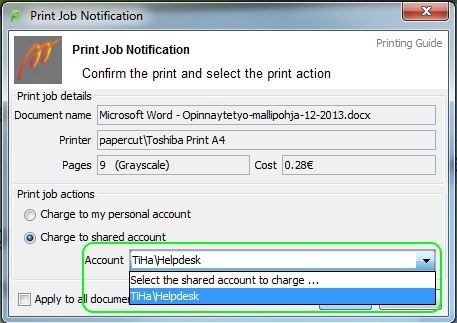
When you print to the Toshiba Virtual Queue, the client software checks the print job and asks you whether the job is charged to
- a shared account
- your personal account

By default, the job is charged to your personal account. The client software displays in the same red field
- the name of the print job
- the number of pages
- color / black & white
- charge

If you want the job to be charged to a shared account, select the account in the drop-down menu. The client software lists all shared accounts that you are authorized to use.
Send the print job by tapping Print.
Releasing print job at a multifunction printer
Log on to the device by placing you card close to the card reader.
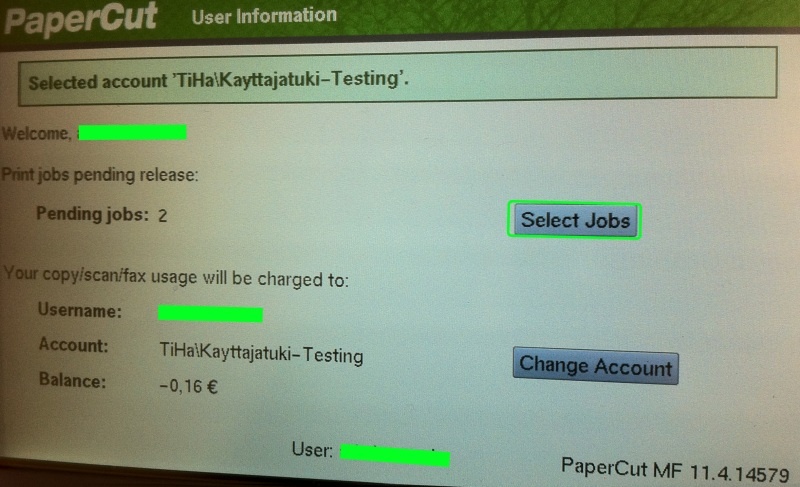
Tap Change Account to select a shared account:

Next, select in the menu the account that the job is charged to:

Next, tap Select Jobs:

Print all jobs by tapping Print all or select individual jobs by tapping Print on the same line that the job is listed:

To log out touch push the Access button in the key pad:

Making copies using a shared account
Making copies using a shared account is very similar to printing.
Log on to the device by placing you card close to the card reader.
Select Change Account to select a shared account:

Next, select in the menu the account that the copies are charged to:

Select the copy mode by pushing the Copy button in the panel on the right:

Make copies as you normally do. When you finish, remember to log out by pushing the Access button.
- Created by Kalevi Lehto, last modified on 21.3.2018